User Tools
Sidebar
Table of Contents
VIM3/3L Secureboot
Introduction
The default image compiled by Fenix for Ubuntu/Debian does not support Secureboot. For ordinary users, Secureboot functionality is not necessary.
Enabling Secureboot means that the board can only flash image signed with the same key, it won't be possible to flash any other unsigned image or image signed with a different key anymore.
If you want to enable the Secureboot feature, you can follow this documentation to apply extra patches and sign the image.
- Only support eMMC installation image.
Warning
Before you start, please note:
- You know what you are doing and what you want to do.
- Once the board is secured, we can't provide proper support for it anymore.
- The Secureboot key can only be flashed once, and it is irreversible, so caution is advised when flashing.
- The generated key must be securely stored because once the key is flashed, you will only be able to flash images signed with this key in the future.
- Make sure to conduct thorough testing and ensure that the image is production-ready before enabling the Secureboot feature.
Apply patches to support secureboot
Download and apply patches .
~/vim3-secureboot-patches$ tree
.
├── fenix
│   └── 0001-packages-images_upgrade-bump-to-1b40968.patch
└── u-boot
    └── 0001-don-t-decrypt-dtb-when-secureboot-enabled.patch

2 directories, 2 files
There 2 patches, one is for Fenix, and the other one is for u-boot.
Compile the image
You can compile the image after apply the patches.
Generate the signing key
Download the sign tool decompress it and double click AmlEToolV3.exe to open it:
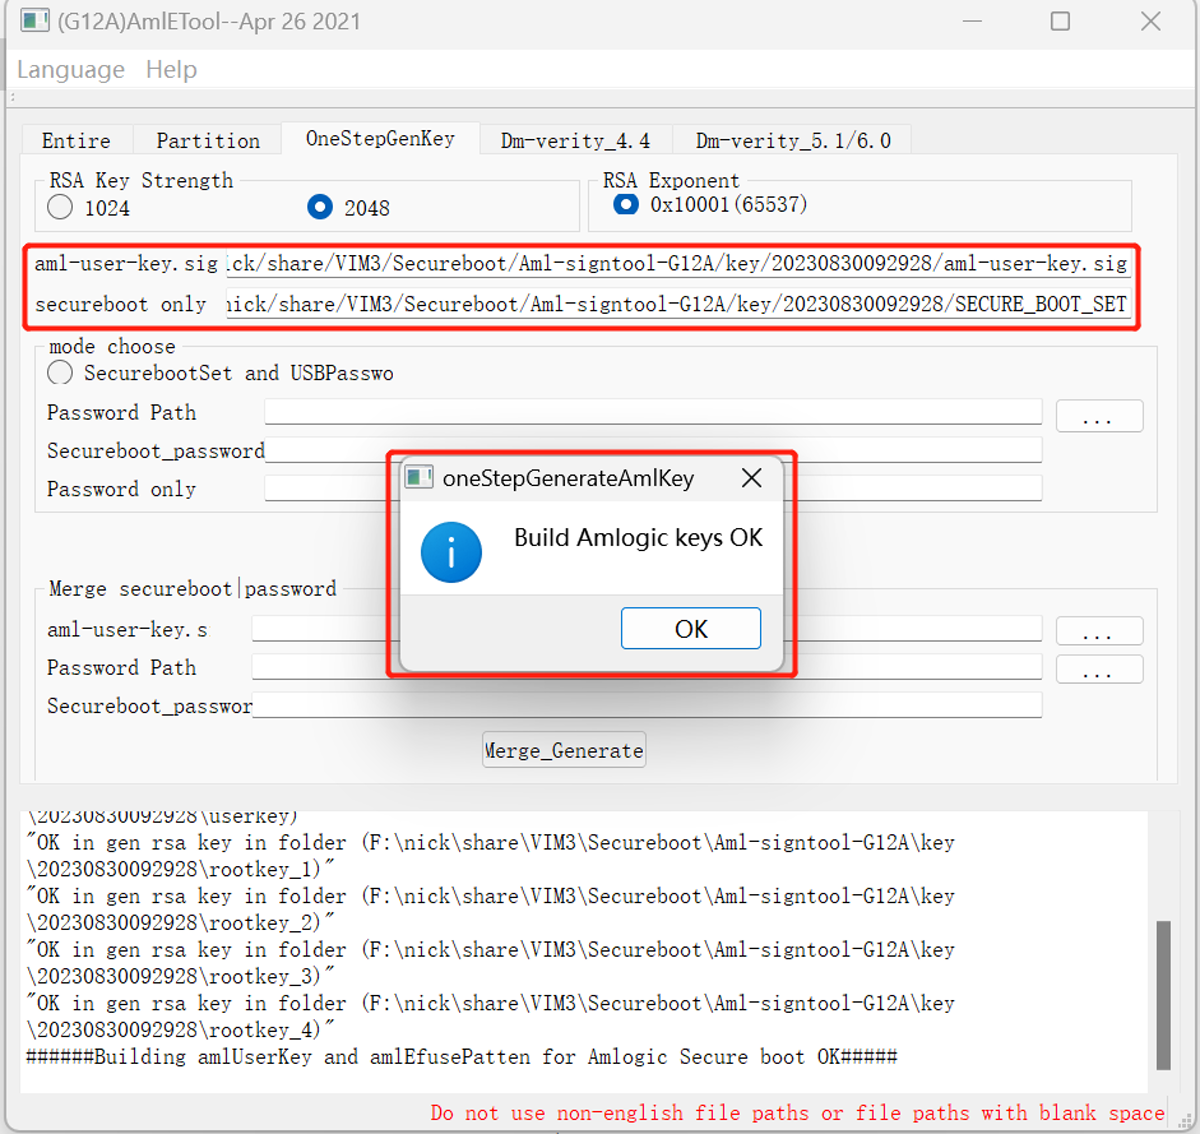
Select OneStepGenKey and check 2048 then click Generate to generate the keys:
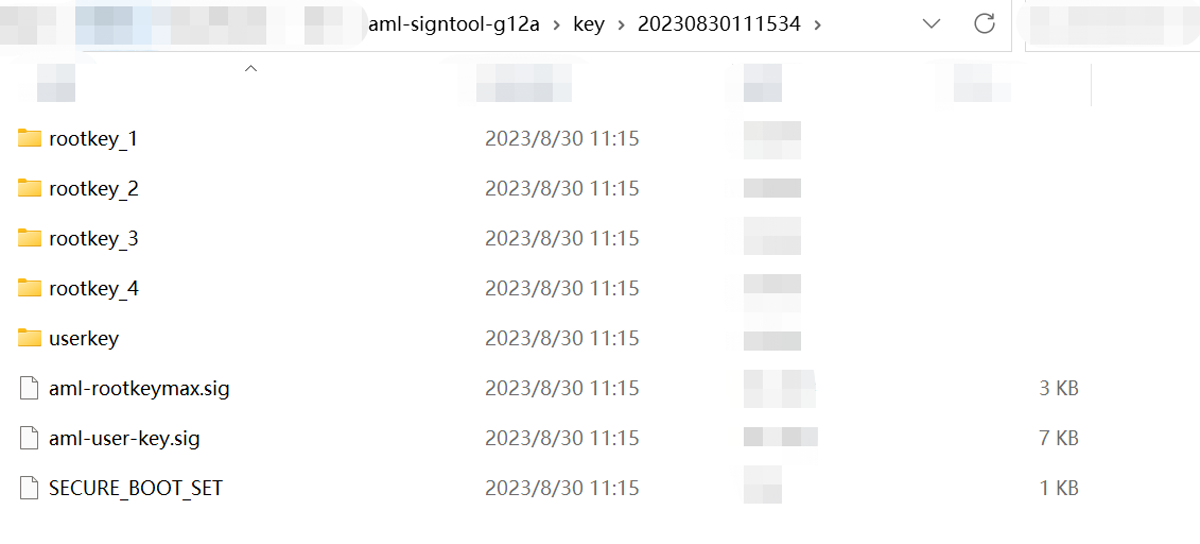
The path of generated keys is in the key directory within the current sign tool's directory, named after the current time:
You need to save the files aml-user-key.sig and SECURE_BOOT_SET:
aml-user-key.sig- Used to sign the imagesSECURE_BOOT_SET- Used to burn the key
Encrypt the image
- Only support sign tool under Windows system.
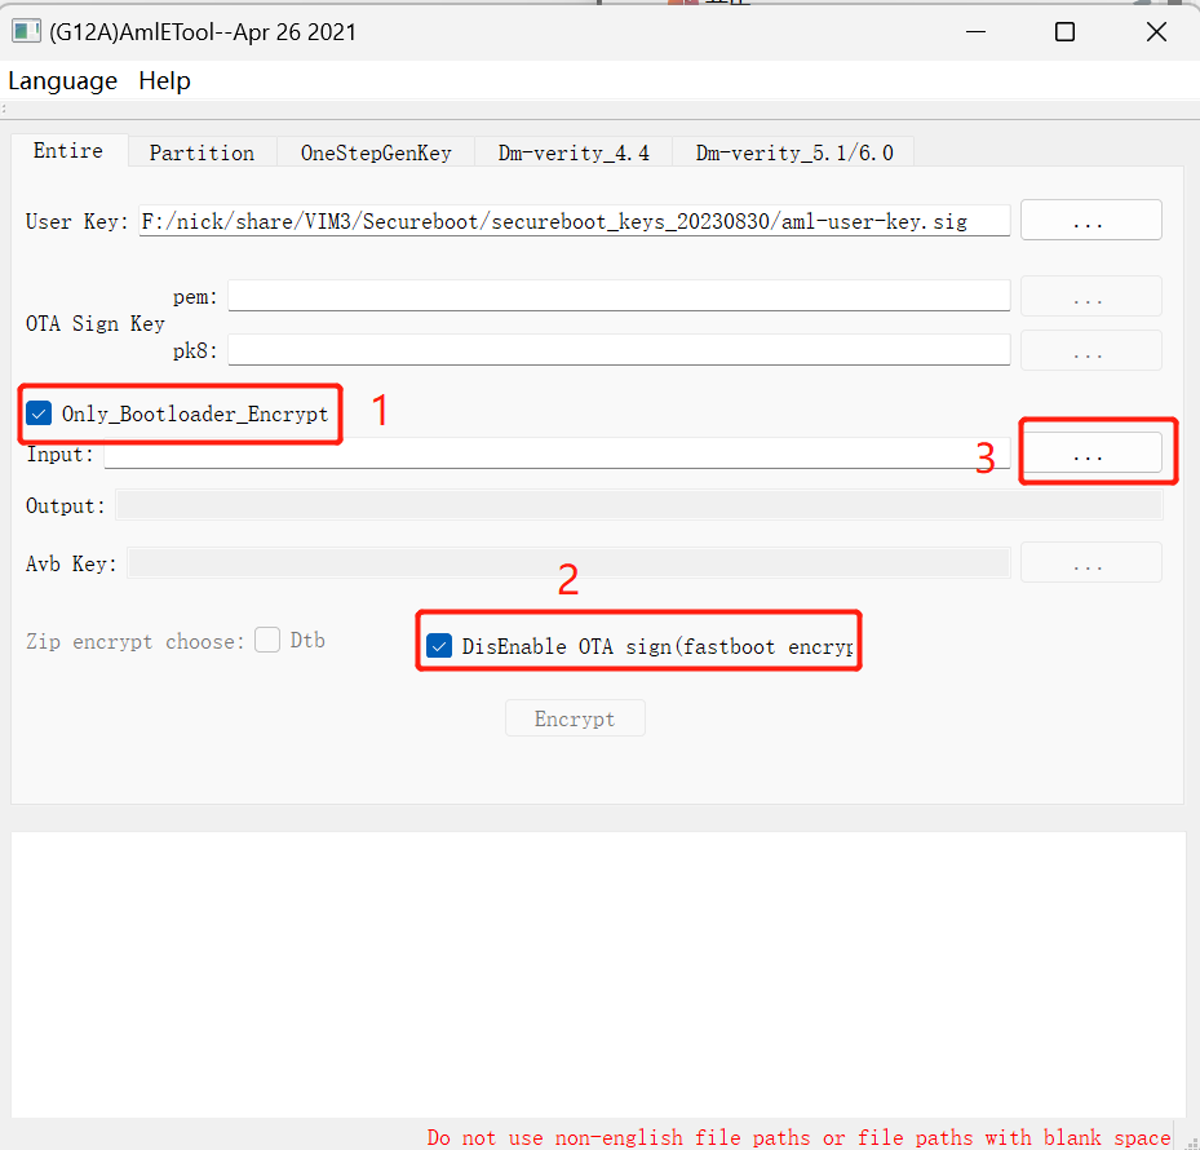
Also using the sign tool AmlEToolV3.exe, select Entire, import the User Key, which is the file aml-user-key.sig generated before,
and also check Only_BootLoader_Encrypt and Disable OTA sign. Then import the image that needs to be encrypted in the Input:
Then click Encrypt to encrypt the image.
After successful signing, a new encrypted image will be generated in the original image directory, with a filename containing the secureboot suffix,
e.g. if the orignal file is vim3-ubuntu-22.04-server-linux-4.9-fenix-1.5.2-230830-emmc-develop.img, then the encrypted image is vim3-ubuntu-22.04-server-linux-4.9-fenix-1.5.2-230830-emmc-develop.20230830105011.secureboot.img.
Next, we will explain how to flash this encrypted image.
Flash encrypted image
- Only support USB flash tool under Windows system.
Download and install the USB flash tool, after installation, you need to copy the previously generated file
SECURE_BOOT_SET to the licence directory within the USB tool installation directory,e.g. C:\Program Files (x86)\Amlogic\USB_Burning_Tool\license.
Open the USB flashing tool, import the encrypted image, check the secure_boot_set option, and then click Start to start the flashing process.
The key can only be flashed once, meaning you should only check secure_boot_set during the first encryption image flash.
Do not check it again for next time flashing with the same board.


