User Tools
Sidebar
Table of Contents
Edge2 PWM
Introduction
This page introduces the usage of hardware PWM, and leads you to control the hardware PWM on the 16-pin Header .
For Edge2, in order to use the PWM function, you need to attach the IO extension board.
PWM Information
| PWM | PIN | GPIO Name | GPIO Number | DT Overlays Node | Device Node | |
|---|---|---|---|---|---|---|
| Edge2 | PWM14 | 13 | GPIO3_C2 | 114 | edge2-io-pwm | /sys/class/pwm/pwmchip2 |
Enable PWM
In order to use the PWM, you need to enable the PWM function via Device Tree Overlay.
Edit /boot/dtb/rockchip/rk3588s-khadas-edge2.dtb.overlay.env to add pwm node to fdt_overlays node if it doesn't exist.
You need to add edge2-io-pwm to node fdt_overlays if it doesn't exist to enable PWM14.
fdt_overlays=edge2-io-pwm
After reboot, you will see the pwm device node.
$ ls /sys/class/pwm/pwmchip2
device  export  npwm  power  subsystem  uevent  unexport
Disable PWM to Use GPIO
If you want to use normal GPIO instead of PWM, you can remove the PWM node in Device Tree Overlay.
Control PWM
Enable PWM:
echo 0 | sudo tee /sys/class/pwm/pwmchip2/export
echo 1000000 | sudo tee /sys/class/pwm/pwmchip2/pwm0/period
echo 500000 | sudo tee /sys/class/pwm/pwmchip2/pwm0/duty_cycle
echo 1 | sudo tee /sys/class/pwm/pwmchip2/pwm0/enable
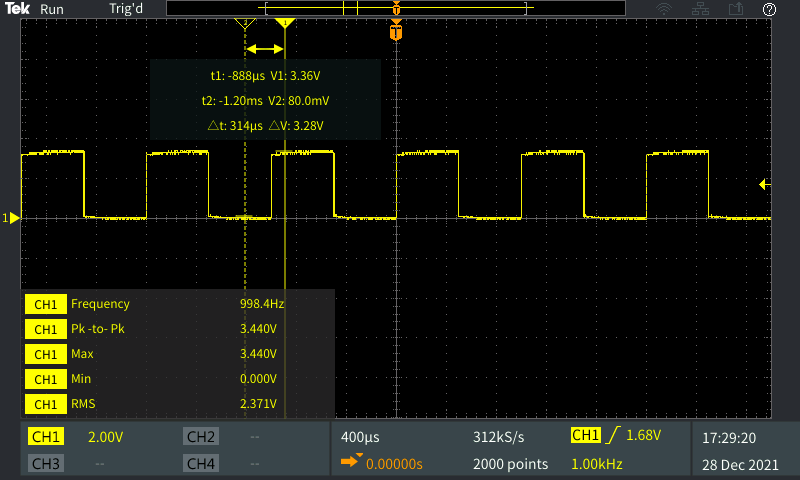
Use an oscilloscope to check if the pins have been successfully enabled.
If you use an oscilloscope to view the PWM waveform, remember that the SBC and the oscilloscope need to share the same GND (ground).
Disable PWM:
echo 0 | sudo tee /sys/class/pwm/pwmchip2/pwm0/enable

