Table of Contents
VIM4 RSDB Wi-Fi
Introduction
This document is mainly about RSDB Wi-Fi (Real Simultaneous Dual Band) which allows you to connect to 2.4G and 5G wifi bands on a network simultaneously. The first part of the document covers how to use RSDB Wi-Fi under Ubuntu Desktop and the second part covers how to use it in Ubuntu Server.
When RSDB is active, It will display wlan0 and wlan1 nodes, you can check the network nodes with
$ sudo nmcli
if wlan1 is not present you can enable it with
$ sudo iw phy phy0 interface add wlan1 type managed
RSDB is enabled by default with 5.15 kernel, if you would like to use it with the 4.9 kernel, you will need to add this line to rc.local file to run it on start up to enable dual wifi band.
echo "iw phy phy0 interface add wlan1 type managed" >> /etc/rc.local
Ubuntu
Desktop
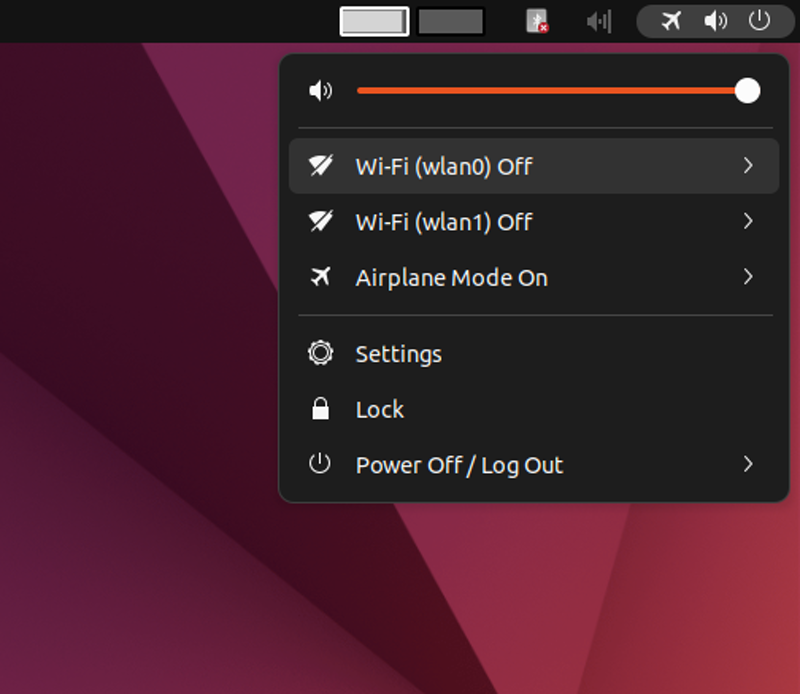
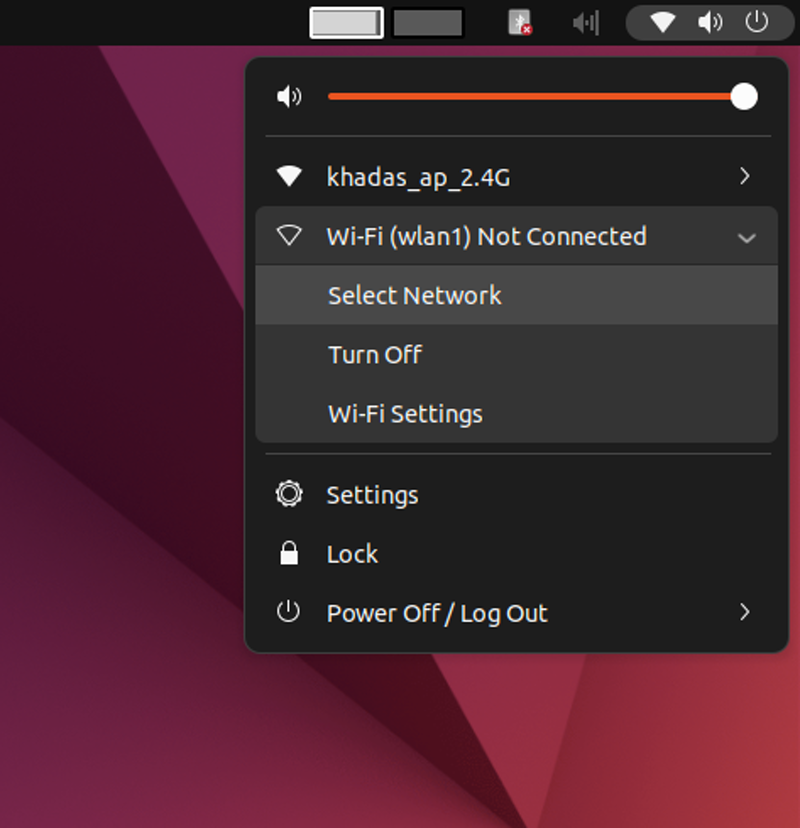
Wi-Fi settings are in the upper-right corner, click on the lower triangle to see the Wi-Fi settings options.
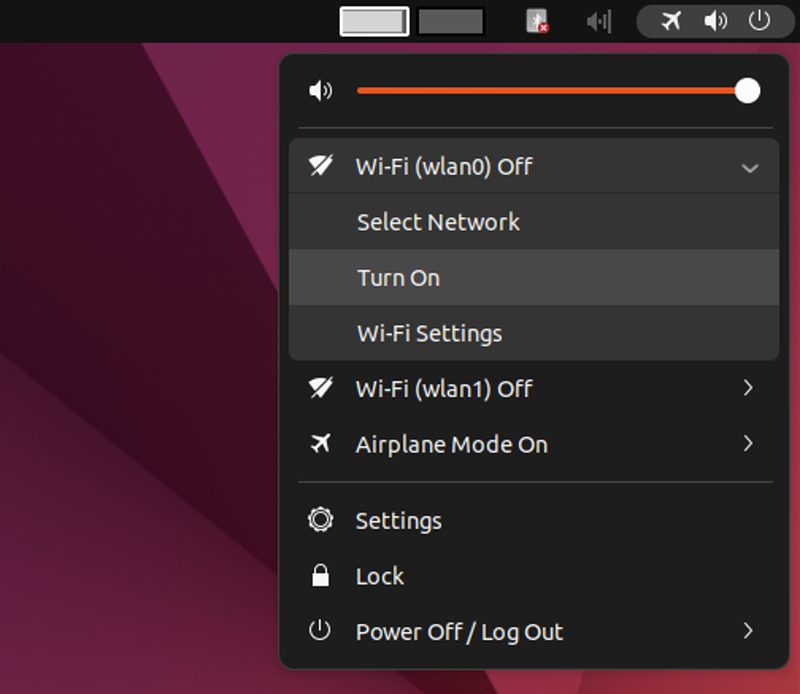
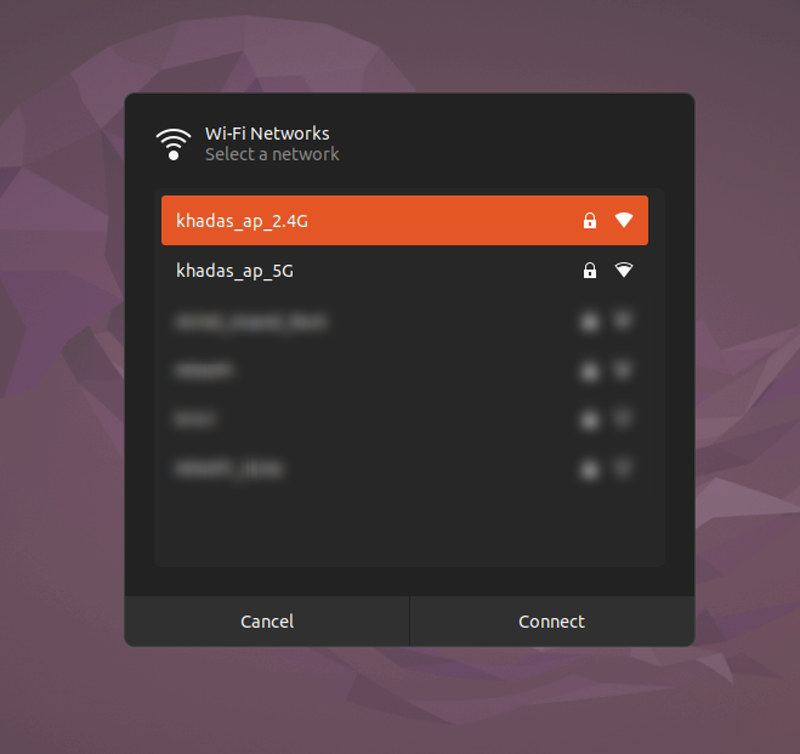
First enable the wifi and select wlan0 node, we will connect it to the 2.4G Wi-Fi band
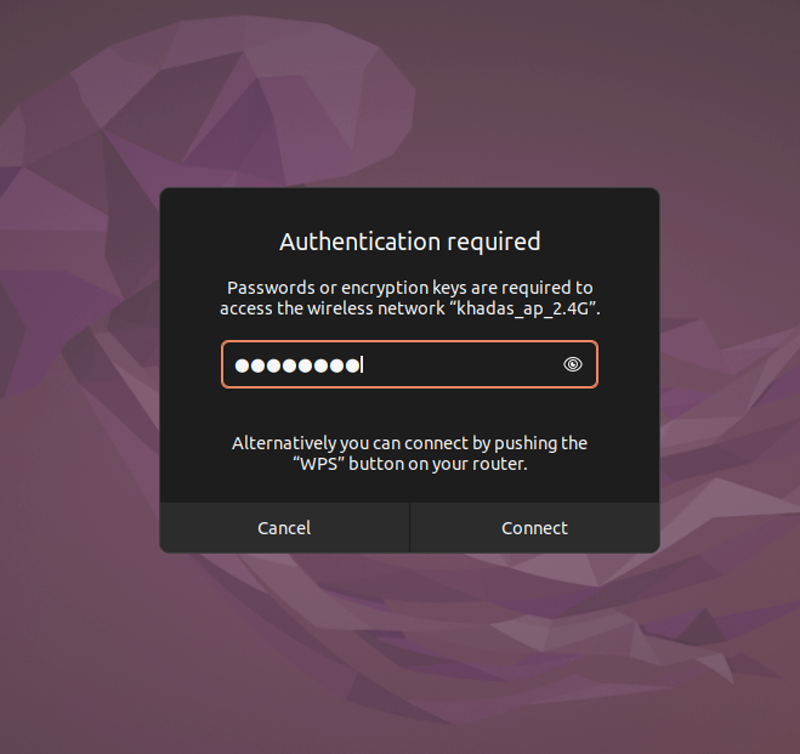
After entering the password, you can 2.4G Wi-Fi will be functional.
Next select the wlan1 node, we will connect it to the 5G Wi-Fi band
follow the similar procedure as connecting wlan0 to setup wlan1 as well.
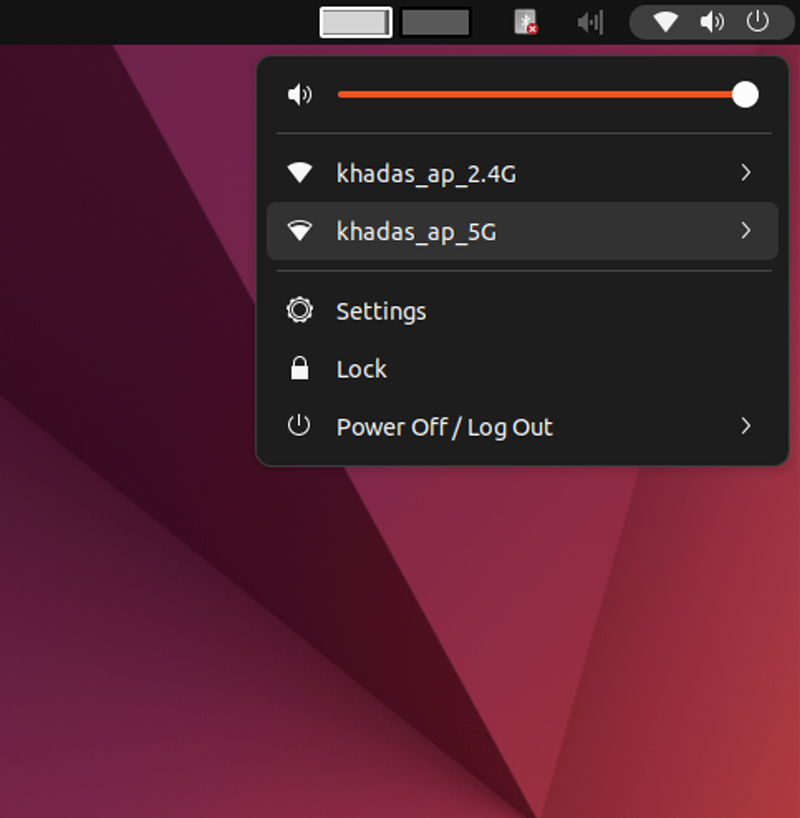
Result should be simultaneous dual band Wi-Fi connectivity.
Server
Ubuntu/Debian servers can use NetworkManager to setup Wi-Fi via command line.
1. Scan for Wi-Fi Networks:
$ nmcli d wifi list
IN-USE  BSSID              SSID              MODE   CHAN  RATE        SIGNAL  BARS  SECURITY
        10:2C:6B:5C:97:62  khadas_ap_2.4G  Infra  1     130 Mbit/s  100     ▂▄▆█  WPA1
        12:2C:6B:5C:97:62  khadas_ap_5G    Infra  149   270 Mbit/s  100     ▂▄▆█  WPA1
        ...
        ...
        ...

IN-USE  BSSID              SSID              MODE   CHAN  RATE        SIGNAL  BARS  SECURITY
        10:2C:6B:5C:97:62  khadas_ap_2.4G  Infra  1     130 Mbit/s  100     ▂▄▆█  WPA1
        12:2C:6B:5C:97:62  khadas_ap_5G    Infra  149   270 Mbit/s  100     ▂▄▆█  WPA1
        ...
        ...
        ...
2. Create a hashed pre-computed PSK-key with wpa_passphrase:
- To avoid storing plain-text passwords, there is an handy tool called
wpa_passphrasethat comes withwpa_supplicant. - Input the command
wpa_passphrase your_ssid your_passwordto create a 256-bit PSK passphrase from your_ssid and your_password.
khadas@Khadas:~$ wpa_passphrase your_ssid your_password
network={
  ssid="your_ssid"
  #psk="your_password"
  psk=6d5324610d3627ab4f97b80cf22b742996d82c022b283a874e88d083a299734c
}
The new password is now a hashed passphrase: 6d5324610d3627ab4f97b80cf22b742996d82c022b283a874e88d083a299734c.
Replace the your_ssid & your_password with your SSID and password. You need to create this for both your 2.4G and 5G wifi SSIDs
3. Connect to the two Wi-Fi Networks:
$ sudo nmcli d wifi connect khadas_ap_2.4G password 5bf31f8d0f00188c7ac3494635cc4fe87898775840e16205c4d3c49957942d36 wep-key-type key ifname wlan0
Device 'wlan0' successfully activated with '35e2d367-9960-473d-a62e-af6f3cf070be'.

$ sudo nmcli d wifi connect khadas_ap_5G password 97aa55969dde78022528e9d66968eccef93bfb543196f32fed973646e651c7ed wep-key-type key ifname wlan1
Device 'wlan1' successfully activated with 'c26af039-8eb6-4f9e-9248-d4155f376968'.
Replace khadas_ap_2.4G and khadas_ap_5G and the 256-bit PSK passphrases with your SSID and passphrase.
4. Disconnect from the Wi-Fi Networks:
$ sudo nmcli d disconnect wlan0
Device 'wlan0' successfully disconnected.

$ sudo nmcli d disconnect wlan1
Device 'wlan1' successfully disconnected.
